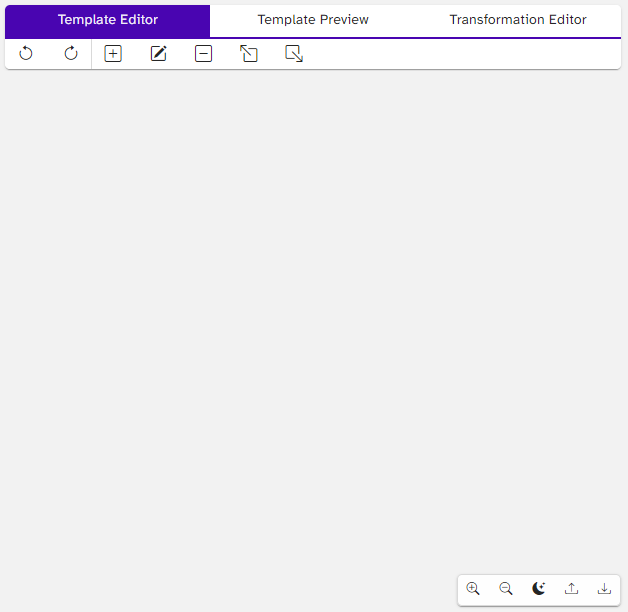
The Edit Pane is the main part of the editor and is located in the center part of the DocuMotor editor’s UI. The Edit Pane is where the user can create and edit transformations and add, remove, and edit bindings in the template.
The pane has three tabs called Template Editor, Template Preview, and Transformation Editor. The first two tabs are dedicated to either editing or showing the template in question, and the last tab is for creating or editing the transformation.
Template Editor tab
The Template Editor tab contains all functionality in relation to uploading and downloading the template, as well as adding, removing, and editing the bindings in the template.
When the Template Editor tab is, active, five different buttons are available in the bottom right corner of the Edit Pane. These buttons are for zooming in and out in the editor, switching the contrast of the template editor, and uploading and downloading the template.

One of the more striking differences, from the other tabs in the pane, is that the Template Editor tab has a toolbar right below the tabs. This toolbar contains functionalities for editing the template. This includes undoing and redoing, inserting, editing, and deleting bindings in the template, and moving these bindings either a level up or a level down to make sure they are around the correct element in the template.

Note that the following sections describe how to use the functionalities in the Template Editor tab and do not describe the different types of bindings. To learn more about the binding types, click here.
Managing Bindings
When working with the template in the Template Editor tab, the main feature is that it is possible to insert, remove, and edit bindings directly in the template.
Undo/Redo
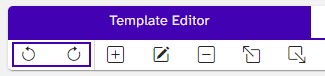
The first two buttons (read from left to right) are the Undo– and Redo buttons. These are simply used to either undo or redo any action that has been done in relation to the bindings in the template. For example, if the user has deleted the wrong binding, they can click the Undo button, and the deleted binding will come back.
Inserting Bindings
The below example shows how to insert a field binding around a piece of text in the template.
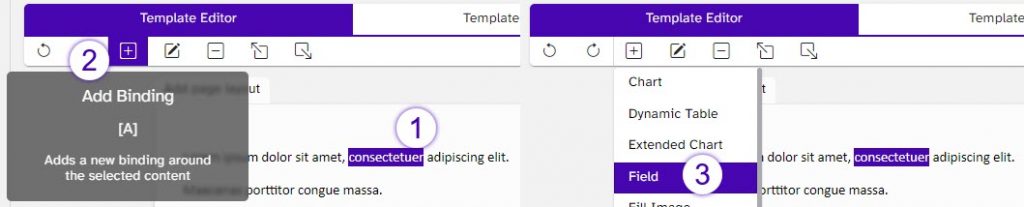
The user starts by selecting a piece of text in the template that should be encapsulated by a field binding (Step 1). Next, the user clicks the Add Binding button (Step 2). Then they click the Field button in the drop-down, which opens the Field Binding pop-up (Step 3).
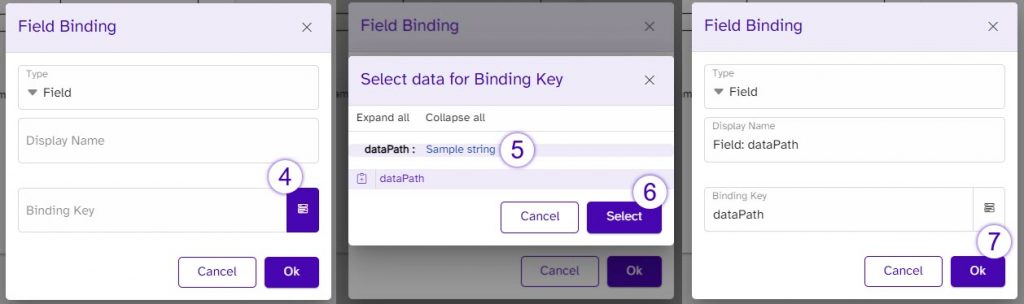
When the Field Binding pop-up is shown, the user clicks the Binding Key button that opens the Select data for Binding Key pop-up (Step 4). Then the user selects which data from the shown transformed data should be referenced in the binding (Step 5) and clicks the Select button (Step 6). Finally, the user can now see the binding’s name has been automatically generated and that the binding key is the selected data from the previous step. Now the user clicks the Ok button to confirm (Step 7). Note that in the binding pop-up, it is also possible to click the top drop-down and select/change the binding type, for example, in case that the user may have selected the wrong binding to start with.

Now it is possible for the user to see that the binding in the template editor has the “F” tag for Field, and the generated document in the Quick Preview tab in the Result Pane has the data inserted in the Field binding’s place.
Note that for image and chart bindings, it is not currently possible to insert a binding around these elements in the document through the Template Editor. To manage image and chart bindings in the editor, an empty content control should be put around the image/chart in the template before uploading it to the editor. If this has been done, the Template Editor will show the content control as an undefined binding, and this can be clicked and edited so the right binding will be added.
Removing Bindings
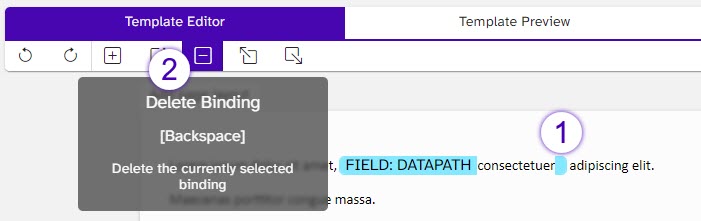
As seen in the below image, to remove a binding, the user clicks the binding they want to remove so it is selected (Step 1), and then they click the Delete Binding button (Step 2).
Editing Bindings
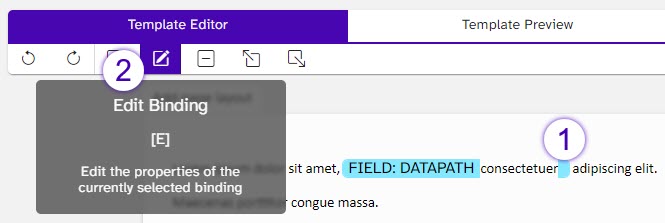
To edit a binding, the user clicks the binding they want to edit, so it is active (Step 1). Then they click the Edit Binding button (Step 2), which opens a binding pop-up where the user selects the type of binding and/or selects a new data path as in steps 4, 5, 6, and 7 in the Inserting Binding section above.
Moving Bindings Up & Down in the Template Hierarchy

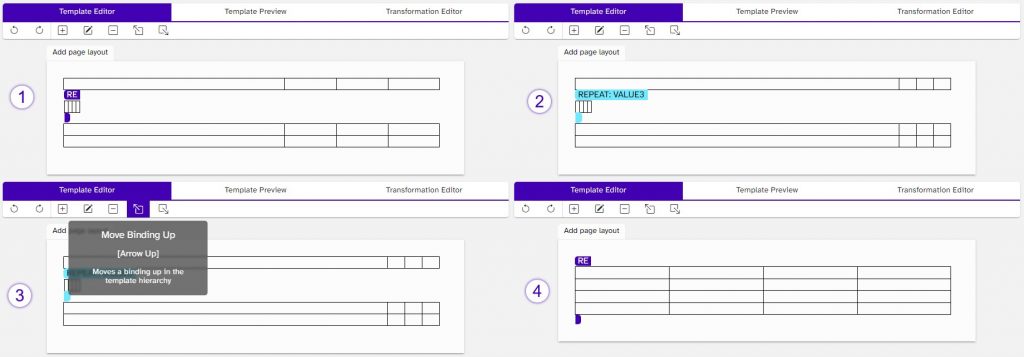
The two buttons to the right, called Move Binding Up and Move Binding Down, enable the user to move the selected binding up and down in the template hierarchy. This means that the binding will either include more document content (moving the binding up) or include less document content (moving the binding down). For example, if there has been put a repeat binding around a table row and the user clicks the Move Binding Up button, the binding will now contain the entire table.
Template Preview tab
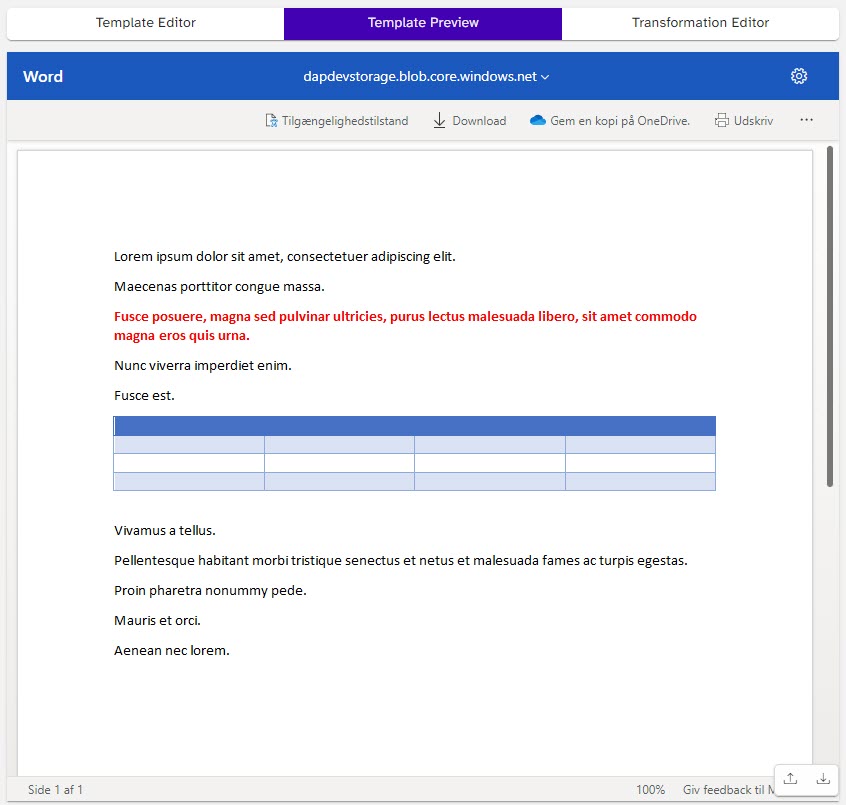
The Template Preview tab enables the user to see a correct preview of the uploaded template as it would look in the Office application. When this tab is active, it is also possible to upload and download the template in the bottom right corner of the pane, as in the Template Editor tab.
Transformation Editor tab
The Transformation Editor tab is the editor for creating and editing the data transformation for the template. When writing a transformation, the editor can suggest built-in JMESPath functions and show where in the transformation any errors or warnings would occur. The editor also has a CodeLens feature that enables the user to step into the scope of the transformation.
The following sections will explain these editor functionalities in depth. To read more about how to write Data Transformations and the available functions, click here.
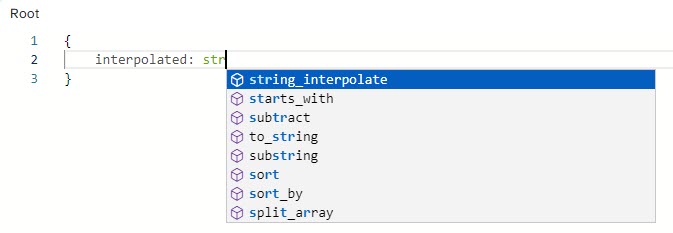
Function Suggestions
To get the editor to suggest built-in JMESPath functions, the user just begins to write a functions name, and the editor will suggest functions that has names related to the written text.
The user can also press ctrl + SPACE on their keyboard if they want to browse all built-in JMESPath functions available.
Warnings & Errors
If the transformation has any warnings or errors, the Transformation Editor will show indicators that underline the exact line in the transformation where there is a warning/error and also mark the scrollbar to the right with a colored line so the user can easily navigate to the place in the transformation where the warning/error is.
For the warnings, the lines are yellow, and for errors, the lines are red. When the user hovers over the underlined transformation, it will show some text explaining what the warning or error is.

CodeLens
CodeLens is a feature in the Transformation Editor that enables the user to step further down in the transformation. This is done by clicking the small link above the transformation line, as seen in the image below, where the user first has clicked the array functions link (Step 1), which brings the user further into the scope of the transformation. Next, the user clicks on the joinedToString link (Step 2), which takes the user further down the transformation scope (Step 3). To get back to the upper levels of the transformation, the user can click the breadcrumbs at the top of the Transformation Editor.
